  |
|
|
|
|
|
|
| |
|
|
|
|
|
|

About the Author:
What
do you think?
|
Loctite - Friend or Foe? by Kevin "Six" Polk Photos courtesy the Henkel Loctite Corp. It is an accepted fact that if you work on paintball markers, even your own marker, eventually you will find a use for a thread-locker. By far the most popular thread-locker in use today is Loctite®, made by the Henkel Loctite corporation, and will be the focus of this article. Loctite® is a brand name for a family of adhesive products that include thread-lockers and other adhesive products. Thread-lockers are compounds that prevent nuts and bolts from becoming unscrewed, either intentionally or through normal use. They do this by filling in the small spaces between the nut and bolt threads, thereby increasing the contact area to 100%, as we will learn later. This increase in surface area contact increases the friction thereby increasing the force required to remove the nut or bolt. Thread-lockers come in a variety of products designed for a wide range of applications; including permanent, removable, and even thread-lockers that work with plastic products. Unfortunately, most Loctite® users are not aware of the proper procedures, which is what we will cover in this article. Before we talk about how to use Loctite®, first lets discuss several characteristics of Loctite®. For our purposes, well discuss several products from the Loctite® family of products commonly used by Airsmiths. Loctite produces a large variety of thread-lockers, in a variety of colors. An Airsmith used to be able to tell someone to use blue or red Loctite® and they would use the proper type. Considering the tremendous variety of Loctite® today, blue or red Loctite® could now mean several different types. Among the most popular types used by Airsmiths today are 242 (removable strength), 271 (permanent strength), and a new product 243 (somewhere in between). Many people ask why Loctite® is so expensive. According to Loctite®, the primary reason is the bottling method. As we will learn later in this article, air has a lot to do with the curing process. The bottles used to store Loctite® have the ability to allow air to move through the bottle. Before talking about how Loctite® works, first lets understand the difference between the curing process and drying. When Loctite® dries out, it does not achieve the same effect as when it properly cures. The curing process requires two elements: metal ions and a lack of oxygen (anaerobic environment). Simply put, when you place Loctite® on a metal bolt and screw it in, you are providing metal ions from the metal, and depriving it of air (oxygen), both elements necessary for the curing process. This curing (instead of drying) is essential to how Loctite® creates the bond between the threads that gives us the thread-locking effect.
This is where Loctite®
comes in. As seen in Image 4, Loctite® fills
in the small space and, once cured, provides 100% contact with the thread
surface area. This increased contact area dramatically increases
the force required to remove the bolt. According to Loctite®
engineers, Loctite® currently makes 4 products
that are applicable to the Airsmith community: Loctite®
products 242 (Removable Strength), a relatively new product 243 (Removable
Strength), 271 (Permanent Strength), and 290 (Removable Strength, Wicking
Grade). Although Loctite® does make a pre-applied
product, it is considered an OEM product.
Finally, a Loctite® coated nut or bolt does not have to be torqued hard to achieve the thread-locking effect. Loctite® can begin to cure within a couple of hours, but depending on temperature and humidity, can take up to 24 hours to fully cure and achieve maximum bond. Personal experience has shown that it is important to shake the bottle prior to use. If the bottle sits for a period of time, the ingredients can settle to the bottom, and unless the bottle is shaken prior to use, it can result in an improper bond. One more use of Loctite® is that it can be used in place of Teflon® tape. Since Loctite® seals the spaces between threads, it also seals air and CO2 pressure as well, and serves to provide an air-tight seal on pressure hose fittings. If this is done, any adjustment can break the seal. It is therefore important to remove, clean, and reinstall the Loctite® per manufacturers guidelines to keep the seal. Loctite® can also help repair the seal with damaged threads, a feat Teflon® tape cannot do. Finally, when using Loctite® to seal threads, its appearance is much cleaner than having white Teflon tape showing; important on many of todays high dollar flashy markers. In short, Loctite® use is not just grabbing a bottle and covering the threads. All areas of application; proper cleaning, application, and installation are important. The new Loctite® 243 and Loctite® 290 products continue to gain popularity in paintball and Airsmithing, and serve to give Airsmiths a growing arsenal to choose the exact tool for the job. Loctite is a registered trademark of the Henkel Loctite
Corporation
|
| Copyright © 1992-2019
Corinthian Media Services. WARPIG's webmasters can be reached through our feedback form. All articles and images are copyrighted and may not be redistributed without the written permission of their original creators and Corinthian Media Services. The WARPIG paintball page is a collection of information and pointers to sources from around the internet and other locations. As such, Corinthian Media Services makes no claims to the trustworthiness or reliability of said information. The information contained in, and referenced by WARPIG, should not be used as a substitute for safety information from trained professionals in the paintball industry. |
 To
fully understand how the filling effect of Loctite®
creates the thread-locking effect, one must first understand a little bit
of thread theory. If we were to take a cross section of a bolt threaded
into a block, it would look like Image 1. In a perfect world, our
threads would look like the Perfect Threads in Image 2.
To
fully understand how the filling effect of Loctite®
creates the thread-locking effect, one must first understand a little bit
of thread theory. If we were to take a cross section of a bolt threaded
into a block, it would look like Image 1. In a perfect world, our
threads would look like the Perfect Threads in Image 2.  Unfortunately,
most threads are cut using some type of tap or die. The resulting
threads are much less clean, more jagged, as in Image 3. As a result
of these cut threads, the contact of the bolt to the threads decreases
dramatically. Normal cut threads have a contact area of around 60-70%.
Factors such as tap or drill sharpness, heat, cutting fluid, and other
factors can affect the contact area of threads.
Unfortunately,
most threads are cut using some type of tap or die. The resulting
threads are much less clean, more jagged, as in Image 3. As a result
of these cut threads, the contact of the bolt to the threads decreases
dramatically. Normal cut threads have a contact area of around 60-70%.
Factors such as tap or drill sharpness, heat, cutting fluid, and other
factors can affect the contact area of threads.  As
a result, cut threads have less contact area, which results in less friction
to prevent the bolt from vibrating or working loose.
As
a result, cut threads have less contact area, which results in less friction
to prevent the bolt from vibrating or working loose.
 Depending
on what type of product used, this bond can be removable or permanent.
Loctite® defines removable as being able to be
removed with simple hand tools, and permanent as requiring heat to remove.
Depending
on what type of product used, this bond can be removable or permanent.
Loctite® defines removable as being able to be
removed with simple hand tools, and permanent as requiring heat to remove.
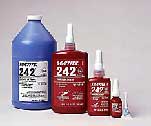 The
242 product is a light blue color, and being removable strength, it can
be disassembled with common hand tools. The 242 product is by far
the most popular product with Airsmiths. According to Loctite®
engineers, the 242 product may require the use of a Loctite®
primer agent. They recommend using the primer product when the threads
have some type of coating that would minimize the amount of metal ions,
such as anodizing, powder coating, or paint.
The
242 product is a light blue color, and being removable strength, it can
be disassembled with common hand tools. The 242 product is by far
the most popular product with Airsmiths. According to Loctite®
engineers, the 242 product may require the use of a Loctite®
primer agent. They recommend using the primer product when the threads
have some type of coating that would minimize the amount of metal ions,
such as anodizing, powder coating, or paint.
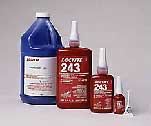 A
new member of the Loctite® family is the 243 product,
which is a dark blue or purple color. Advertised by Loctite®
as being more oil tolerant than 242, and self-priming, this product will
surely gain popularity in the Airsmith community. The Loctite®
engineers tout this product as much more tolerant of dirty threads, especially
when oily or lubricated, yet approximately the same strength as 242 which
makes it perfectly suited to the Airsmiths bench.
A
new member of the Loctite® family is the 243 product,
which is a dark blue or purple color. Advertised by Loctite®
as being more oil tolerant than 242, and self-priming, this product will
surely gain popularity in the Airsmith community. The Loctite®
engineers tout this product as much more tolerant of dirty threads, especially
when oily or lubricated, yet approximately the same strength as 242 which
makes it perfectly suited to the Airsmiths bench.
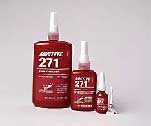 The
271 product, which is red in color, is permanent, and is the most commonly
used in CO2 valve cylinder installation. According to Loctite®,
this product requires the use of heat to effectively break the bond and
disassemble the parts, a problem since cylinder manufacturers recommend
that cylinders not be heated. Loctite® further
states that the use of excessive force to disassemble can cause thread
damage.
The
271 product, which is red in color, is permanent, and is the most commonly
used in CO2 valve cylinder installation. According to Loctite®,
this product requires the use of heat to effectively break the bond and
disassemble the parts, a problem since cylinder manufacturers recommend
that cylinders not be heated. Loctite® further
states that the use of excessive force to disassemble can cause thread
damage.
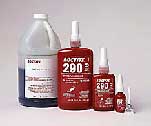 The
final product recommended by Loctite® engineers
is the 290 Wicking Grade product. The unique property of this product
is that it can be applied after the bolt is adjusted. Its thin properties
allow it to wick down into the space between the threads. This product
can be used after you have adjusted your marker, and want to hold that
setting without it vibrating loose.
The
final product recommended by Loctite® engineers
is the 290 Wicking Grade product. The unique property of this product
is that it can be applied after the bolt is adjusted. Its thin properties
allow it to wick down into the space between the threads. This product
can be used after you have adjusted your marker, and want to hold that
setting without it vibrating loose.
 Proper
use of Loctite® involves not only using the correct
type, but also applying it in the correct place and using the right amount.
Applying too much or not enough can cause the Loctite®
not to have the desired effect. Proper application involves putting
the Loctite® on the end of the threads (Image
5), this assures full coverage over the length of the threads during installation.
Applying Loctite® as in Image 6 would not provide
full coverage when threaded as Loctite® would
not cover the length of the thread. Furthermore, none of the previously
mentioned
Proper
use of Loctite® involves not only using the correct
type, but also applying it in the correct place and using the right amount.
Applying too much or not enough can cause the Loctite®
not to have the desired effect. Proper application involves putting
the Loctite® on the end of the threads (Image
5), this assures full coverage over the length of the threads during installation.
Applying Loctite® as in Image 6 would not provide
full coverage when threaded as Loctite® would
not cover the length of the thread. Furthermore, none of the previously
mentioned  Loctite®
products are considered adjustable, that is to say that they arent designed
to be adjusted once the Loctite® has cured.
This readjustment causes a crumbling effect that, while still helping to
thread-lock, it reduces the strength and seal Loctite®
provides. For full strength, Loctite® recommends
removing the bolt or nut, cleaning off all remnants, and reinstalling per
manufacturers guidelines.
Loctite®
products are considered adjustable, that is to say that they arent designed
to be adjusted once the Loctite® has cured.
This readjustment causes a crumbling effect that, while still helping to
thread-lock, it reduces the strength and seal Loctite®
provides. For full strength, Loctite® recommends
removing the bolt or nut, cleaning off all remnants, and reinstalling per
manufacturers guidelines.